How to mod my games
My games (ever since “Markov Space”) are set up to let any part of the game be modded with just a zip file, and come with some mod-assistance tools built in. I never got around to documenting any of this. I guess I should do that. I’m gonna do that now.
If you’re not fascinated by technical details, I suggest jumping down to “An example: HOWLER?” below.
Overview
Any game based on my Polyconsole tools has a set of hidden developer’s features, mostly there to support my own debugging but also useful for modders (and sometimes players). Some of these features are not user-accessible in the release versions of my older games, but you can still get at them by either building a debug build yourself or in some cases brain-transplanting the media.pak file out of one game and into a more recent one.
Things you can do with these features:
Change the screen resolution
(Present since at least: The World Hates You)
By default, Polyconsole games use the whole screen and current screen resolution. However at startup they read a file named “settings.xml” that can be used to change this. If you open up Notepad (or whatever), paste in the following, and save as “settings.xml” in the same folder as the game .exe or .app:
<?xml version=”1.0″ ?>
<settings fullscreen=”false” width=”800″ height=”600″ />
It will set the fullscreen/windowed mode, height, and width as appropriate. You can of course change the specific width and height numbers how you like, or change fullscreen “false” to “true”.
Get a debugging console
(Present since at least: The World Hates You)
Polyconsole games also check at startup for a file named “debug.xml”. Actually, they don’t care what’s in this file. They just want it to be there. If the file is there, the game enters “debug mode”. There are three things that are different in debug mode.
First off, in debug mode you can access a Lua console at any time by hitting “tab”. Any syntax errors in the game code get printed to this console, and you can type lua code as commands here (for example, print() calls).
Second off, and maybe a bit more usefully, in debug mode hitting “esc” at any time reloads the current “room”— the current stretch of game, basically. This is very useful if you’re changing Lua on disk while this is happening. (In a few games the magic key is “F4” instead of “esc”.)
Third off, in debug mode the constant “_DEBUG” is true. In some games this changes behavior slightly.
By the way, when you save these .xml files— settings.xml or debug.xml— make sure you really are saving them as .xml and not as .xml.txt.
Create a mod
(Present since at least: Markov Space)
With Polyconsole games, the .exe or .app is basically just a projector that usually contains very little “game”. The actual “game” (all the resources, shaders and Lua code) is stored in an innocuous-looking file named media.pak. You can find this in the Internal/ directory on Win/Lin and inside the app package on Mac. The “.pak” file is actually just a misnamed zip file.
When Polyconsole loads files out of this .pak file, it “shadows” them by looking in two additional locations:
- The contents of “mod.zip” in the same directory as the .exe or .app
- The files inside of a folder named “mod” in the same directory as the .exe or .app
The mod.zip is laid out the same way as the media.pak, and the mod folder is laid out as if you’d placed the mod.zip into the “mod/” folder and then unzipped it.
If the finds a file inside either the mod zip or folder (and it prefers the mod folder to the zip) it acts as if the file in media.pak is replaced with the mod version of the file. This allows you to overwrite any resource or code file the game uses.
Oh, and by the way: I only added loading from the “mod” folder/zip support around The World Hates You somewhere, however all the way back to Markov Space you can still do a mod just by renaming your mod.zip to “media.pak” and replacing the media.pak that’s already there.
Take a screenshot
(Present since at least: Sweet Nothings)
Press F8.
Another by-the-way: some graphics programs don’t seem to be able to open the screenshots made by Polycode. I find if I open it in a program that *can* open it (Preview on the mac works) and then save it again, the problem is fixed.
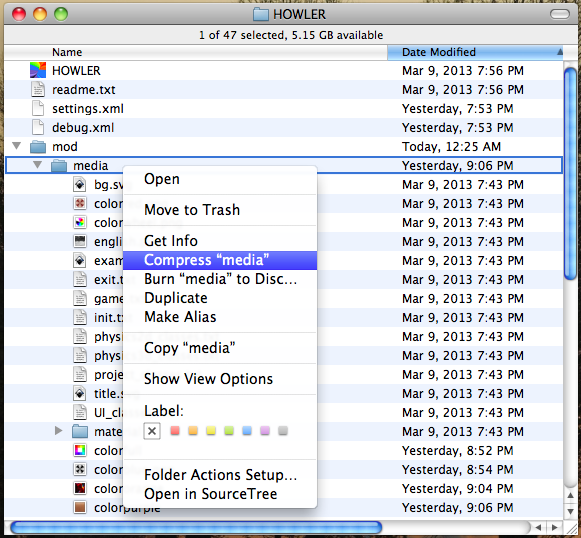
An example: HOWLER?
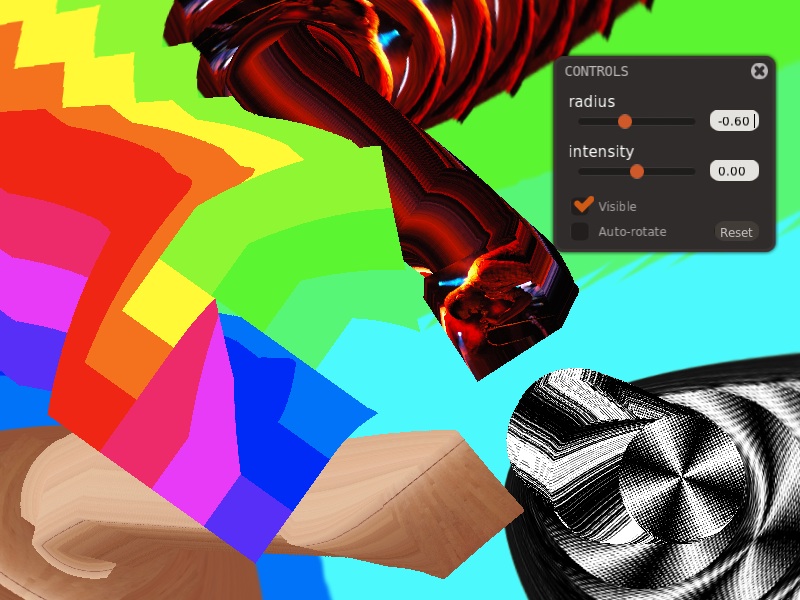
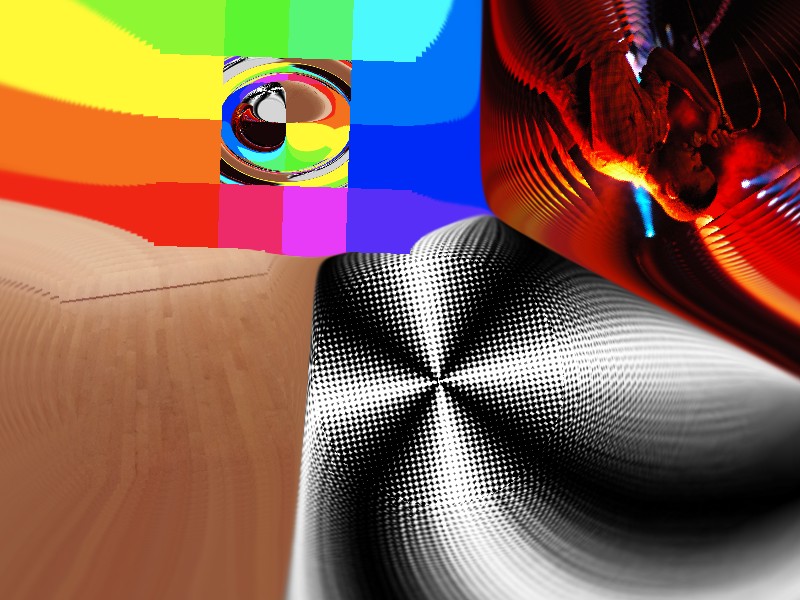
Let’s walk through doing this with HOWLER?, which is a little art toy where you push some colored discs around the screen and they warp and deform space around them. HOWLER? makes images that look neat, but they’re all a little same-y— what if we replaced the discs with some other, more interesting objects?
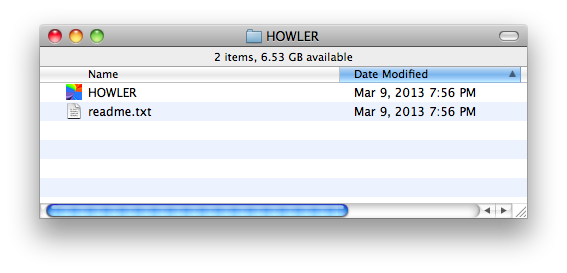
To start off with, you can download HOWLER? here. You’ll see:
In the screenshots I’m gonna do this on the Mac, but things will be about the same on Windows.
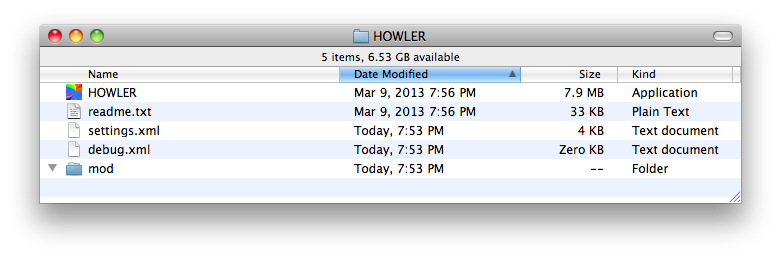
We wanna start just by making the files that tell the game to go to mod-editing mode. We want to make three things: A file named settings.xml, a file named debug.xml, and an empty folder named “mod”. You can make settings.xml and debug.xml in Notepad using the instructions I give above, OR you can just download a settings.xml I made here and a debug.xml I made here. You should now have:
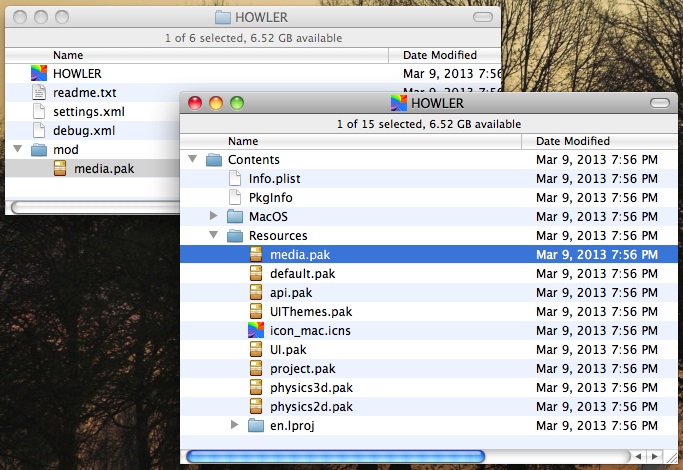
Now we need to find the “media.pak” zipfile— that’s where all the game resources actually live. On Windows and Linux, this is easy— just look in the “Internal” folder. On the mac, you’re going to have to hold down “control”, click on the HOWLER app, and click “show package contents”. This opens up the app to let you see inside. media.pak is in “Resources”, inside “Contents”.
You want to COPY, not move, media.pak from that Resources directory (or on Windows, the Internal directory) and into the “mod” directory you just made:
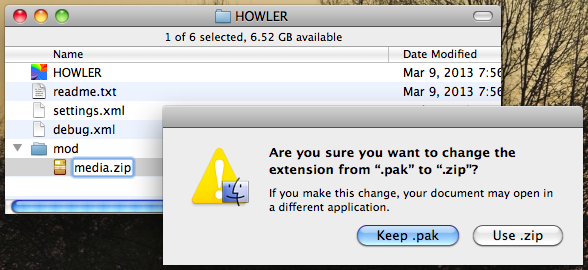
Now we want to unzip it— the media.pak is actually just a disguised zip file. You should be able to just rename media.pak to “media.zip”:
Then double click it. You should now have a folder named “media” inside of your “mod” folder. We’re done with the “media.zip” file now, so go ahead and delete it.
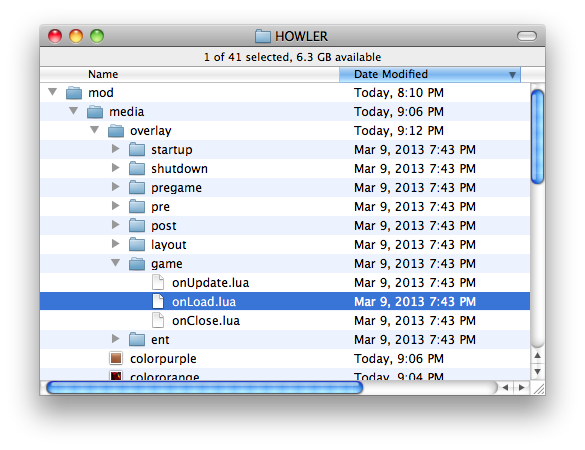
If you look in the “media” folder, you’ll see, well, the whole game:
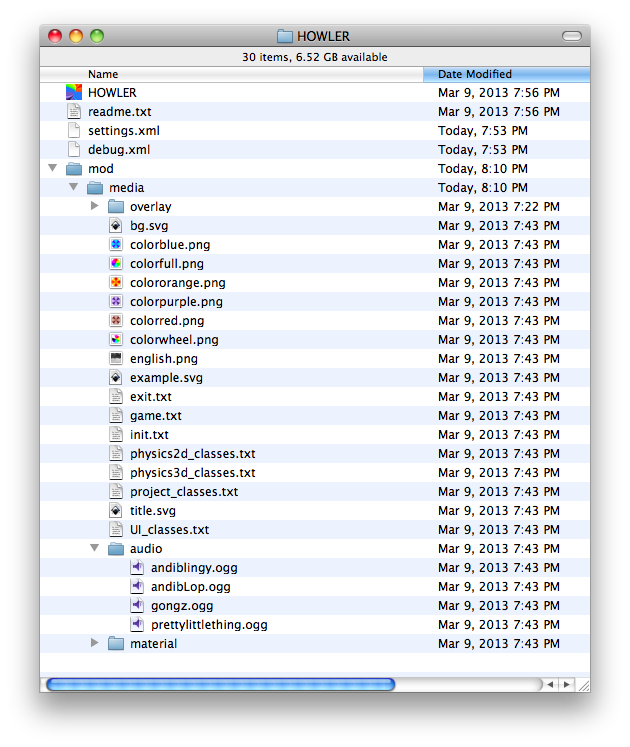
Right there you’ll see all the “color wheel” images from HOWLER?, plus an “audio” directory containing the soundtrack oggs. You’ll also see some other maybe-mysterious files. In order of descending importance:
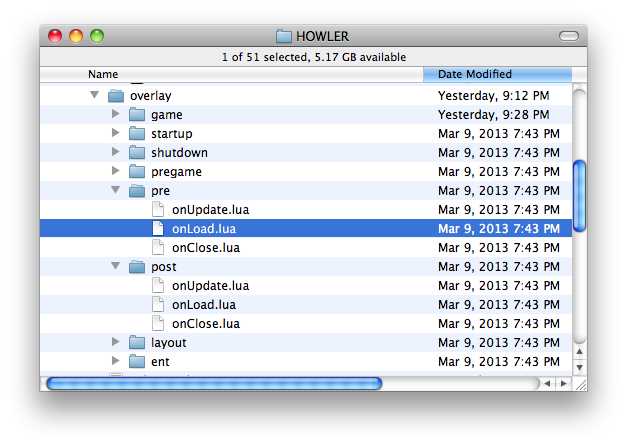
- A folder named “overlay”: The game’s source code files (Lua scripts) are in there— you can just open those up and edit them in Notepad.
- A folder named “material”: The “shaders”, if you know what those are, are in there; in HOWLER?, the screen-warpy effect is in a file named FilterShader.frag. Like the lua files, you can edit the .frag just fine in Notepad.
- “init.txt”, “game.txt”, “exit.txt”: These are the game’s three “rooms”. I’ll come back to this in a moment.
- Several files with names ending in “_classes.txt”: These are just needed for Polyconsole to work; you should just ignore these. (Or you can delete them, and it will load the originals out of media.pak.)
- Several files with names ending in “.svg”: These actually aren’t part of the game at all, and I apparently packed them in by accident!
Let’s go ahead and make a simple change to the game. Start by opening it up and letting the game start:
Because of the settings.xml file, the game is running in a window. And because of the debug.xml file, another thing changes: If you press “F4”, the current screen will reset itself. (In most of my other games this debug-reset button is ESC, but here it’s “F4”.)
Let’s leave HOWLER? open, and back in our “mod” folder open up “colorfull.png” in an art program. In this picture, all I did was pixelate the PNG a bit, scribble on it, save it again, then close and reopen HOWLER?:

So far, seems to be working! (Though, two little quirks I notice. First off, I *EXPECT* that pressing F4 to load the scene should have caused my newly-saved “colorfull.png” to be instantly loaded into the program. It didn’t, it reloaded the scene but left the textures as they were. I guess that’s some sort of bug. But that’s okay, because all I had to do was close and reopen the program and it loaded right. One other thing: You might notice I scribbled on “colorfull.png” with white, but in the screenshot— here’s the zoomed in version if you can’t see it clearly— it looks black. This is because the specific screen-warpy visual effect in HOWLER? doesn’t work well with images with semitransparent “alpha”, which the pen in this particular art program always uses. Annoying; I’ll have to make sure to use a different program for this next step.)
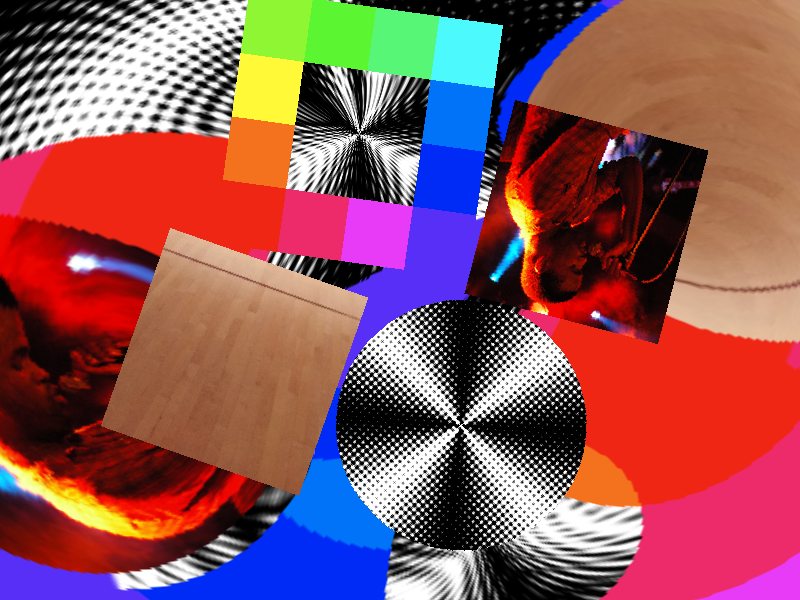
Anyway, this is a start. I keep going, and I make new graphics for all four of the orbs: colorfull.png, colorblue.png, colororange.png, and colorpurple.png.

Now it looks like:
I’m not sure if that’s an improvement, but it’s different! Playing with it though, I notice something weird— the images are now little squares, but they bump up against each other like they’re still big circles. This is because although the images themselves are stored in these PNG files, their “shapes” in a physics sense come from the source code.
We can fix that. Let’s edit the source code, to make the squares act like squares. If we go back to our “mod” folder, it’s time to look inside that “overlay” folder:
Each of the subfolders here is what I call an “overlay”— a hunk of scripts that go together. I split my games up into “rooms”, and each room is made of 3 to 5 “overlays” that combine together. “Overlay” and “room” are just words I made up, I don’t think any other game engine uses this exact terminology. Anyway this particular game has three “rooms”, the intro screen (“init.txt”), the outro screen (“exit.txt”), and the “game itself” (“game.txt”). If you look inside any of the “room files” back up in the media folder, you’ll find each one is just a list of names of overlays from the overlay folder.
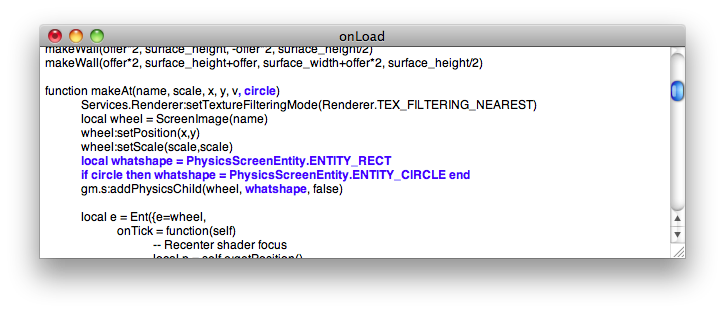
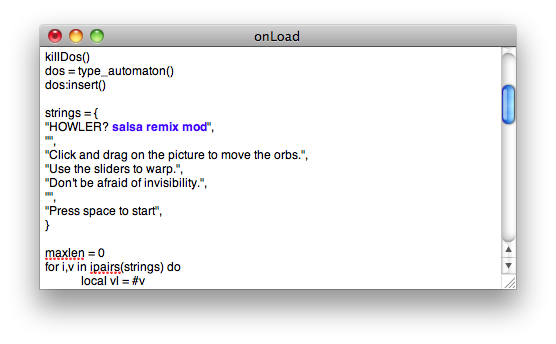
But! We don’t need to worry about most of that, because HOWLER? is a pretty simple game, and almost all the important code is stored inside of “onLoad.lua” inside the “game” overlay. Let’s open up that game/onLoad.lua file in Notepad (or, well, I used TextEdit because I’m on a mac).
We want to change how the game treats our PNG files it loaded, right? So let’s look inside the lua file for the PNG file names. Sure enough, there they are:
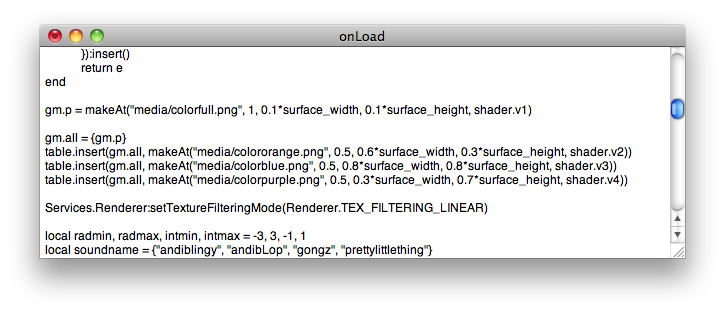
Uh… well, that certainly isn’t very clear code! Did I mention I made this game in a single day? But if we know a little bit of Lua— or even if we don’t— we can see we’re calling this “makeAt” function four times with different numbers and the names of our four files. So what’s “makeAt”? Apparently it’s somehow making the four orbs on the screen. And if we poke around in the file we can find the code for makeAt, too:
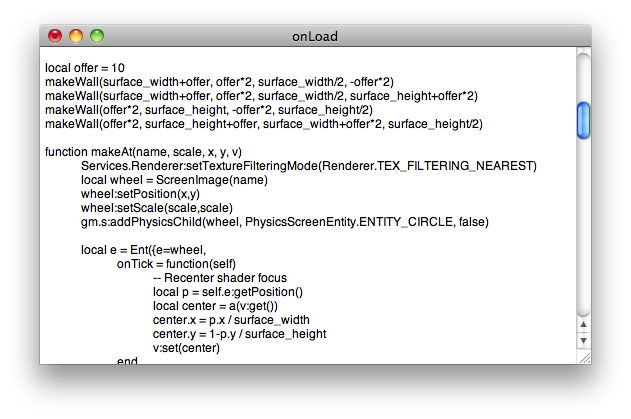
If we look at this, we see a couple things. First off, one of the numbers being passed in to this function is named “scale”— it’s being used to set the size of the image. If we go back and look, it’s being set to 1.0 for the “colorfull” orb, and 0.5 for the others. If you go back and look in the original game, you’ll see the big rainbow orb is twice the size of the others— this is why. You’ll notice another thing in this code snippet here: All the orbs are being created as ENTITY_CIRCLE shapes. That made sense in the original game, but now three of the four shapes are squares.
Let’s make a few changes. I made the bits I changed bold and blue so you can see them more clearly:
Here I change the makeAt function so it takes one more argument— “circle”. Circle is either true or false, if it’s true, we make the object we’re making a CIRCLE, otherwise we make it a RECT (…angle). I’m also going to need to change the place where we call makeAt:
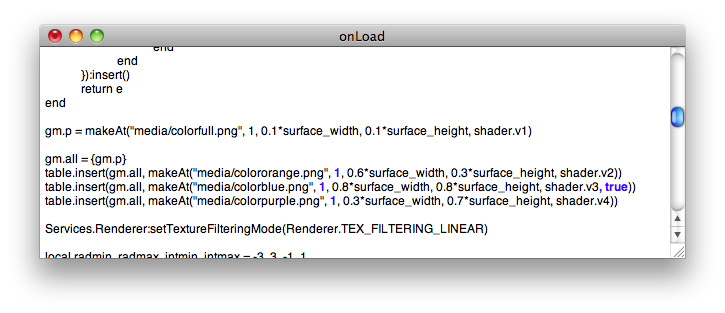
I added a “,true” for the “circle” argument on the one orb that’s still a circle, and I changed all those 0.5s to 1.0 so the pictures won’t be weird and shrunken anymore.
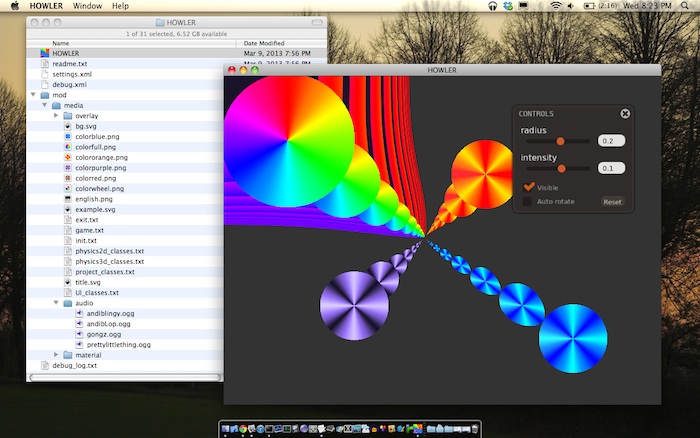
I reopen HOWLER? (or if I’ve left it open, I can just hit F4— the bug we saw before with textures failing to reload doesn’t apply to code) and here’s what I see:
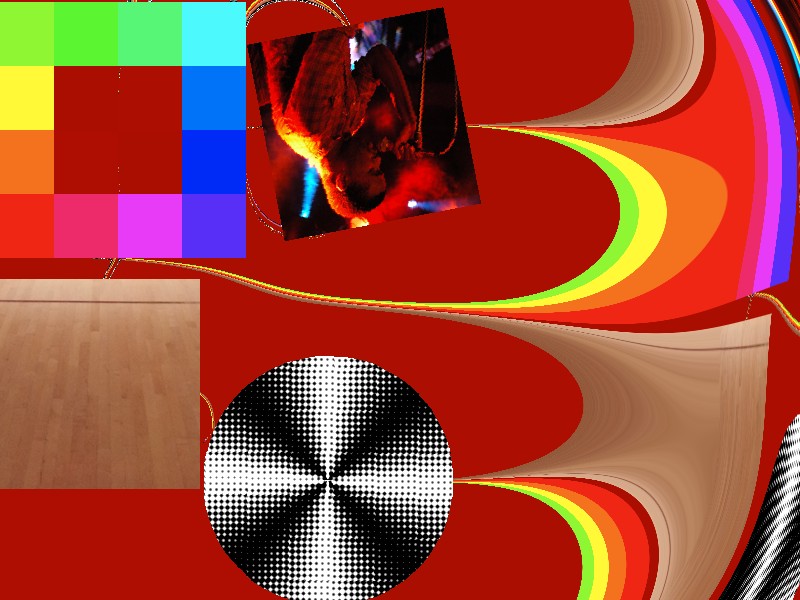
Okay, now that’s actually getting kinda interesting! I think this is becoming something I can call a “mod” with a straight face.
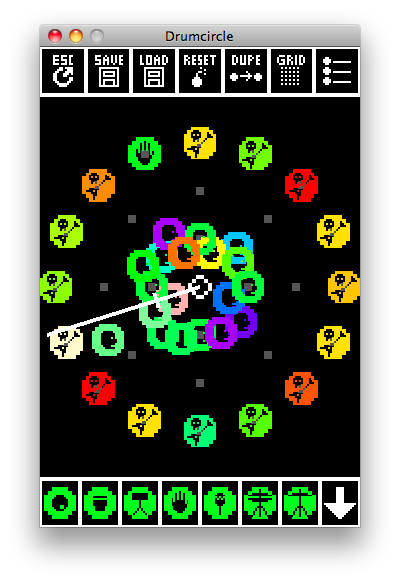
I’m gonna change a couple more things before I call this done. First, just for the heck of it, I’m gonna redo the music. I make some quick loops using Drumcircle and Audacity, and save them over the oggs that are in the media folder now:

For some reason this only works if I save the oggs as stereo. I’m not even going to try to figure out why.
I’m also going to change the title screen (to note that I modded something) and the “exit” screen (since the Liz Ryerson music credit is no longer accurate). If you look in “init.txt” and “exit.txt” (remember, the txt files define the game’s three “rooms”) you’ll see those screens live in the “pre” and “post” overlays:
I go ahead and dig the around in those for the string to change:

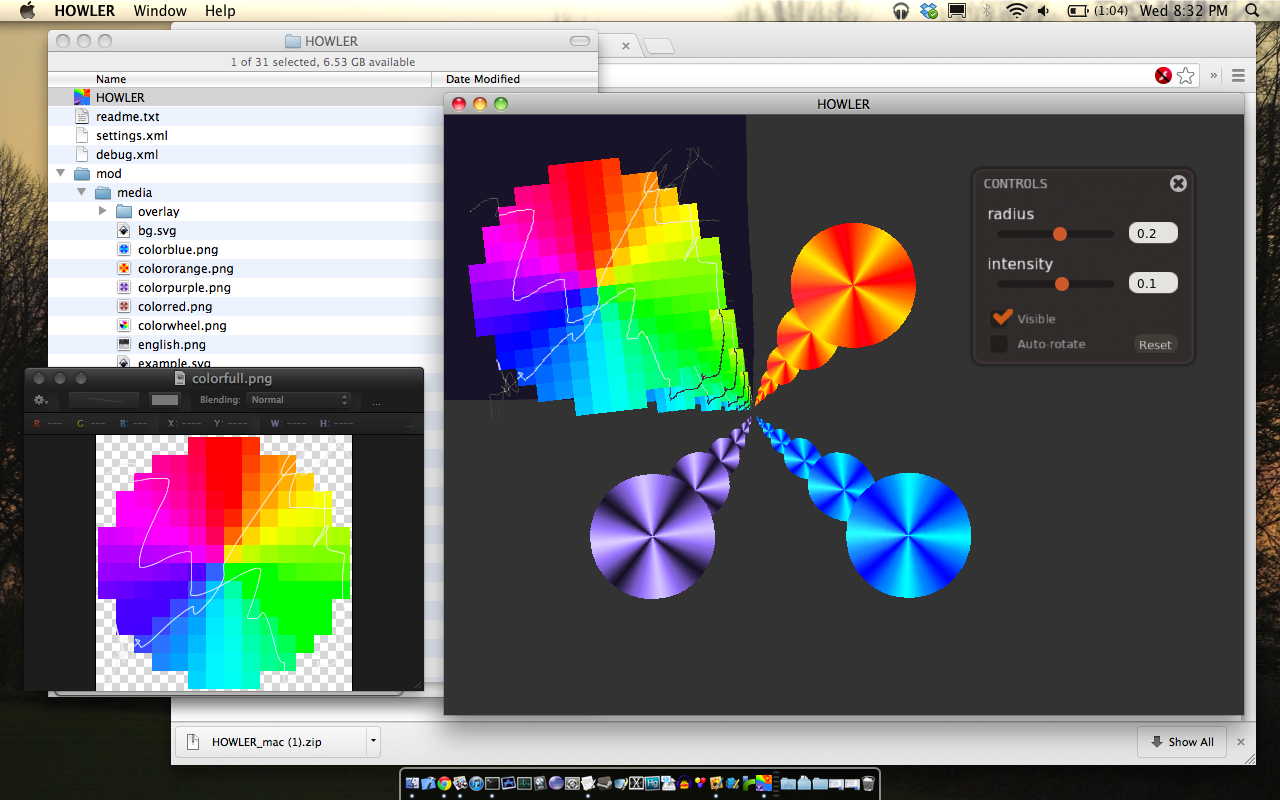
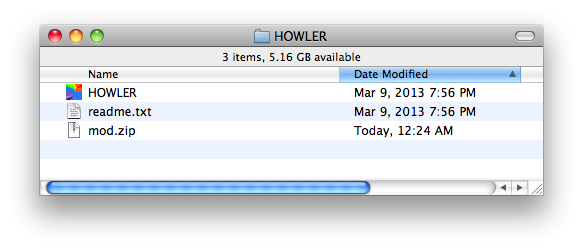
I think my mod’s done! Now what? Well, now I probably want to show it to someone. Fortunately, if I want to let someone try out my mod, I don’t need to send them the whole big “mod” directory. The game will also accept one file named “mod.zip”. To make this, I zip up the “media” dir– notice, I’m zipping the “media” dir, NOT the “mod” dir:
This creates a file named “media.zip”, which I then rename to “mod.zip”. I can now clear out the settings.xml, debug.xml and my “mod” folder and put this zip in the folder with HOWLER.app or HOWLER.exe by itself:
And my mod now works in all its glory!
If you want to download the final mod.zip to try out the mod I’ve been putting together in this example, you can download it here. Again, just place the .zip file in the same directory with the HOWLER program (don’t bother unzipping).
(A license disclosure. The picture of Tunde Adebimpe I use in this mod is a GDFL image from the Wikipedia Commons, so that means this zip is GFDL and if you reuse this zip, you also have to follow the GDFL rules. If you replace colororange.png with something else tho this no longer applies.)
Some extra notes for modders
The above basically covers basic mods (change images, datafiles, constants). If you’re going to be doing any serious rewriting of the Lua in these games, though, here are some random things it might be useful to know:
I posted a writeup of Polyconsole some time back that explains most of how the basic engine works; there’s exhaustive but currently-out-of-date documentation of the “bridge” object and my lua util functions there, for example. The games are of course all written against the Polycode API and using its object system. I usually store constants in a table named “km”, room-specific variables in a table named “gm”, whole-game-global variables in a table named “fm”, and sound effects in a table named “au”. The ubiquitous a() and r() functions are part of my memory management, they cause the targeted variable to be deleted at the end of the frame or room respectively. The “startup” and “shutdown” overlays are also for memory management and you probably shouldn’t touch them. The main overlay for the game is usually named “game” and the library functions are usually in “pregame”. If there’s a title screen overlay it’s often named “attract”. In a couple of cases (Markov Space, for example) there’s at least some Lua hidden inside .svg files but I stopped doing that quickly. Scene() and scene() generally do something different, as do Screen() and screen(), the uppercase versions are constructors whereas the lowercase versions grab a shared room-global object (if it exists). Sometimes if there’s an error in onLoad.lua it doesn’t get printed to the console on first run, but it appears if you open the console and hit the reload button (esc or F4). The print() function in Polyconsole can pretty-print tables.
Anybody still reading?
Did you follow any of that? Either way, here’s one last cool thing for making it this far. Here’s one more HOWLER? mod I made. Place this zip file in the same folder as the HOWLER? app or exe and enjoy.